

Unlocking the Power of DALL·E 3 in C#: A Comprehensive Guide for .NET Enthusiasts
Unlocking the Power of DALL·E 3 in C#: A Comprehensive Guide for .NET Enthusiasts
Guide beginners on how to use OpenAI's DALL-E API to generate unique images


Disclaimer: The provided code is intended for educational and personal use only. Misuse of the code for other purposes is not endorsed. It is crucial to maintain the confidentiality of your OpenAI API keys. Sharing them publicly can lead to unauthorized access and potential misuse. Please handle your keys responsibly.🕰️ Reading time: about 9 minutes
🎧 Speaking time: about 12 minutes
🔔 What’s new?
Great news! We just launched a new "News" section on our blog, featuring the latest updates, insights, and trends.
Hello everyone, welcome back to our tech snippets series. As you know, my main working environment is .NET, and today, we're exploring something truly exciting – Image Generation with DALL-E 3 using C#. I'll guide you through the new features of Dalle-3, and how to leverage them in your C# applications. Let's dive in!
What is DALL-E 3?
DALL·E-3 represents the latest advancement in text-to-image generation models. It excels in creating high-quality images from textual descriptions and offers a wide variety of domains for image generation. According to official guidelines, the DALL·E 3 API has been enhanced with the following capabilities:
It can incorporate text within images.
It is now compatible with both landscape and portrait image formats.
It produces images that are considerably more appealing and intricate.
It can interpret intricate prompts.
Please note: DALL·E-3 is designed to work with highly detailed prompts, and will automatically supplement detail if required, similar to ChatGPT.
FAQ:
Are there different rate limits for DALL-E 3? How can I increase these?
The default rate limits for DALL-E 3 start at 6 images per minute. Over time, there are plans to increase these limits.
Why can I not generate 512 or 256 images any more?
Gone are the days of being limited to smaller 512x512 or 256x256 images - DALL-E 3 unleashes bigger, more detailed 1024x1024, 1024x1792, and 1792x1024 images. While legacy sizes remain compatible with the DALL-E 2 model, DALL-E 3 provides the cutting edge in high-resolution image generation. Tailor speed, cost, and quality to your needs with the new
qualityparameter - draft quality images render rapidly at lower expense, while final renderings showcase DALL-E 3's signature photorealistic fidelity.
What’s the difference between quality options?
The
qualityproperty in DALL·E-3 defaults to “standard”, which creates attractive images quickly and at low cost. If you specify “hd”, the model will take more time to generate images, resulting in higher image quality, but also higher latency.
What does the style option do?
The “style” is a new optional parameter introduced to provide advanced control of the visual style of the generation. The valid options are “vivid” or “natural”. It’s recommended to experiment with this new parameter to determine which option works best for your use case. The default is “vivid”.
Why does DALL·E-3 only support n=1?
For system scalability and reliability reasons, DALL-E-3 currently only supports n=1. If you wish to receive more than 1 image, it’s recommended to make multiple parallel calls to the API.
Things to keep in mind
The API endpoint for DALL·E-3 is '/v1/images/generations'.
There are several parameters to be aware of:
model: Choose between 'dall-e-2' and 'dall-e-3'. Be sure to set it to 'dall-e-3' as it defaults to 'dall-e-2'.
style: You can select 'natural' or 'vivid'. 'Natural' produces more realistic images, while 'vivid' leads to hyper-real and dramatic images.
quality: Choose between 'standard' and 'hd'. 'hd' offers finer details but at a higher cost and longer generation time.
Other parameters include the prompt, number of images (n), size of the images, response format, and user identifier.
Read more here
DALL·E-3's new capabilities propel it to the cutting edge of image generation, granting users unparalleled precision and fidelity. Take advantage of these features to tap into DALL·E-3's full potential for your C# projects - crafting striking visuals, assets, and content. With granular control over image properties like lighting, positioning, and background, your generated images can match your exact specifications. The enhanced image quality ensures high-resolution, photorealistic results. Whether conceiving artistic masterpieces, mocking up product designs, or producing visuals for apps and websites, DALL·E-3 empowers C# developers to effortlessly generate stunning custom images that bring their visions to life.
Implementing DALL·E-3 in C#
Let's discuss how to implement these features in a C# project. We'll set up our project, authenticate with the OpenAI API, and create requests with these new parameters. I'll show you how to handle responses and display the generated images in your application.
To begin with, you'll need to set up your C# environment to interact with the OpenAI API. Ensure you have the latest version of the .NET framework installed, and don't forget to obtain your API key from OpenAI, as it's crucial for authentication.
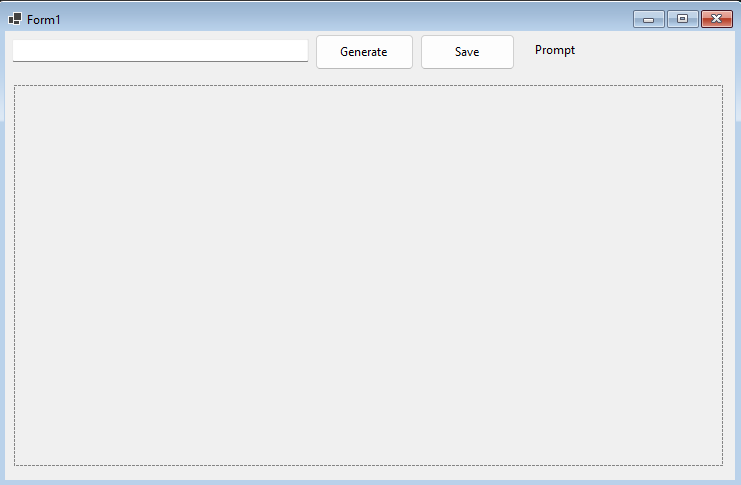
First of all, we need to install the necessary packages. From Nuget Package Manager install Newtonsoft.Json; The Next step is to put a few controls on the form, specifically:
button = genButton
textBox = promptInput
Label = promptDisplay
PictureBox = resultDisplay
button = savePic
Depending on the complexity and purpose, we’ll need the following “using directives”:
using System.ComponentModel;

using System.Net.Http.Headers;

using System.Reflection;

using Newtonsoft.Json;
💡 To make the PictureBox automatically adjust to the size of the image, you can change its SizeMode property.

In this case, if you want the PictureBox to automatically resize based on the image, AutoSize seems like the right choice.
 public Form1()
        {
            InitializeComponent();
            resultDisplay.SizeMode = PictureBoxSizeMode.AutoSize;
        }
Now, we need to design the CallDalleApi method to make an asynchronous HTTP POST request to the Dalle API.
The simple method would be the following:
private async Task CallDalleApi(string prompt)
{
     //Created by Nat from The AI Observer
    // Initialize HttpClient for API communication.
    var client = new HttpClient();
    client.DefaultRequestHeaders.Authorization = new AuthenticationHeaderValue("Bearer", "API-KEY-GOES-HERE");

    // Prepare the request body with the prompt in JSON format.
    var requestBody = JsonConvert.SerializeObject(new { prompt = prompt });
    var content = new StringContent(requestBody, System.Text.Encoding.UTF8, "application/json");

    try
    {
        // Send a POST request to the Dalle API and await the response.
        var response = await client.PostAsync("https://api.openai.com/v1/images/generations", content);
        var responseString = await response.Content.ReadAsStringAsync();

        // Process the API response by deserializing the JSON data.
        // Using 'dynamic' for flexible parsing of the varied response structure.
        var data = JsonConvert.DeserializeObject<dynamic>(responseString);


        DisplayResult(prompt, data);
    }
    catch (Exception ex)
    {
        // Log and alert any exceptions encountered during the API request.
        // Common issues might include network errors, API endpoint changes, or invalid API keys.
        Console.WriteLine("Error: " + ex.Message);
        HideSplashScreen();
        MessageBox.Show("An error occurred while fetching the image.");
    }
}
👉 The code is commented on, and I believe it’s clear enough. This simple request should assist you in working with DALL·E-2. This is merely to help you become familiar with the API.
📝 Your Feedback Matters
🔴 For DALL·E-3, we will need to make a few modifications to the request.
The next step involved creating a new method called DisplayResult:
private void DisplayResult(string prompt, dynamic data)
        {
            var imageUrl = data.data[0].url;
            resultDisplay.Load(imageUrl.ToString());
            promptDisplay.Text = prompt;
            resultDisplay.LoadCompleted += ResultDisplay_LoadCompleted;
        }
The DisplayResult method is designed to display the result of a specific operation. It takes a prompt and data as parameters. The data parameter is expected to be a dynamic object that contains a data property, which is an array. The first element of this array is expected to have a url property, which is the URL of an image. This URL is loaded into a PictureBox control named resultDisplay. The prompt is displayed in a control named promptDisplay. Finally, an event handler is added to the LoadCompleted event of the resultDisplay control.
The upcoming step is about making the form dynamically resized based on the image size. So, we can adjust the size of the form after the image is loaded into the PictureBox.
Love what you read? ☕ Support The AI Observer by buying a coffee! Each sip powers the insight. Support Here
In the following code, the LoadCompleted event of the PictureBox is used to adjust the form size. This ensures that the form resizes only after the image has been successfully loaded. Also, the form's new size is calculated by adding some padding or margin to the image's dimensions, and it's capped to the screen's working area size.
private void ResultDisplay_LoadCompleted(object sender, AsyncCompletedEventArgs e)
        {
            // Calculate new form size
            int newWidth = resultDisplay.Image.Width + resultDisplay.Left + 20; // 20 for padding or margins
            int newHeight = resultDisplay.Image.Height + resultDisplay.Top + 40; // 40 for padding, margins, and title bar

            // Get the screen working area
            Rectangle screen = Screen.PrimaryScreen.WorkingArea;

            // Ensure the new size doesn't exceed screen size
            if (newWidth > screen.Width)
                newWidth = screen.Width;
            if (newHeight > screen.Height)
                newHeight = screen.Height;

            // Set the new size, btw, you can greatly improve this section
            this.Size = new Size(newWidth, newHeight);
        }
Finally, we need to add closing lines to our button for the click event:
var prompt = promptInput.Text;
            if (string.IsNullOrEmpty(prompt))
            {
                MessageBox.Show("Please enter a prompt.");
                return;
            }

          // Call the CallDalleApi method with the prompt, and await its completion.
            await CallDalleApi(prompt);
To work with DALL·E-3, we need to implement a few changes and introduce new features:
var requestBody = JsonConvert.SerializeObject(new
{
model = model,
prompt = userPrompt,
size = imageDimension,
quality = imageQuality,
n = numImg
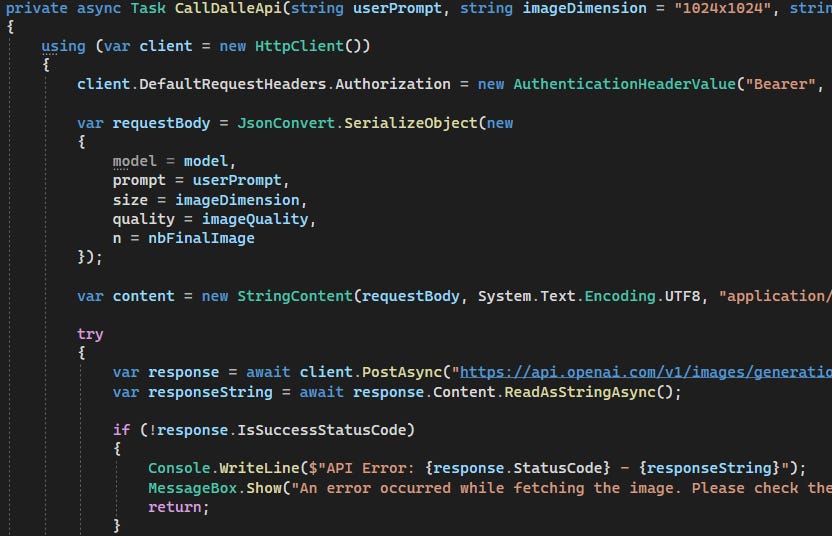
});The revised version of CallDalleApi should resemble the following:
private async Task CallDalleApi(string userPrompt, string imageDimension = "1024x1024", string imageQuality = "standard", string model = "dall-e-3", int numImg = 1)
        {
            using (var client = new HttpClient())
            {
                client.DefaultRequestHeaders.Authorization = new AuthenticationHeaderValue("Bearer", "API-KEY-HERE");

                var requestBody = JsonConvert.SerializeObject(new
                {
                    model = model,
                    prompt = userPrompt,
                    size = imageDimension,
                    quality = imageQuality,
                    n = numImg
                });

                var content = new StringContent(requestBody, System.Text.Encoding.UTF8, "application/json");

                try
                {
                    var response = await client.PostAsync("https://api.openai.com/v1/images/generations", content);
                    var responseString = await response.Content.ReadAsStringAsync();

                    if (!response.IsSuccessStatusCode)
                    {
                        Console.WriteLine($"API Error: {response.StatusCode} - {responseString}");
                        MessageBox.Show("An error occurred while fetching the image. Please check the console for more details.");
                        return;
                    }

                    var data = JsonConvert.DeserializeObject<dynamic>(responseString);
                    DisplayResult(userPrompt, data);
                }
                catch (Exception ex)
                {
                    Console.WriteLine("Error: " + ex.Message + "\nStack Trace: " + ex.StackTrace);
                    MessageBox.Show("An error occurred while fetching the image. Please check the console for more details.");
                }
            }
        }
After implementing the CallDalleApi method and setting up our form, we can now effectively work with both DALL·E-2 and DALL·E-3 in our C# applications. The key difference lies in the request body: DALL·E-3 requires additional parameters like model, size, and quality. This flexibility allows for more tailored and high-quality image generation suited to various applications.
To save the output, we need to add a simple line of code:
resultDisplay.Image.Save(@"D:\dalle\image.png", ImageFormat.Png);Understand the Rate Limits
You may encounter the following error message which is related to rate limits:
API Error: TooManyRequests - {
  "error": {
    "code": "rate_limit_exceeded",
    "message": "Rate limit exceeded for images per minute in organization org-XXXXXXXXX. Limit: 0/1min. Current: 1/1min. Please visit https://platform.openai.com/docs/guides/rate-limits to learn how to increase your rate limit.",
    "param": null,
    "type": "requests"
  }
}
The official documentation about rate limits can be found here, however, if you continue to develop your application and find that the rate limit is too restrictive, you might consider upgrading to a paid plan for higher limits. I found a solution to this issue by reading the OpenAI forum. There, fellow users recommended purchasing credits as a viable solution. You can find more details in the discussion on the forum. https://community.openai.com/t/429-rate-limit-exceeded-limit-0-1min-current-1-1min/565451/2
Pricing details
For those interested in the cost implications, DALL-E versions come with distinct pricing details. Notably, DALL-E 3 offers both standard and high-definition image qualities at different price points. You can read more here about pricing.

FINAL RESULT
CONCLUSION
In conclusion, we've successfully navigated the exciting journey of integrating the Dalle-3 API into a C# application. Starting from the ground up, we meticulously constructed each component, providing detailed explanations every step of the way. This guide is more than just code; it's a pathway for anyone eager to look into the innovative world of AI-powered image generation with DALL-E 3 in a C# framework.
I sincerely hope this guide sparks your creativity and serves as a valuable toolkit in your development arsenal. I encourage you to not only use this code but to also experiment with it. Tailor it, enhance it, and see how you can push the boundaries of what's possible. Remember, in the ever-evolving landscape of coding, each line you write opens up new horizons. So go ahead, explore the vast potential, and above all, enjoy the thrilling experience of coding. Happy coding, and here's to the amazing creations you'll craft with DALL-E 3!
As someone who only uses DALL-E 3 from the end-user perspective in Bing/Copilot and ChatGPT Plus, this is fascinating to me. Looks like you have quite a lot more control over the model by using the API. I might not be able to code around it since I'm not a coder, but maybe I should visit the Playground and check it out.
Thanks for the insights!
Nice work. Clear instructions and easy-to-follow steps.